Sampling — Audio in a Buffer
A recording is a sequence of samples stored in memory. A sampler gives us control over where, when and how quickly those samples are read.
The key change from synthesis: previously our oscillator generated the waveform. Now the sound source is audio that has already been recorded and stored in a buffer.
1. From synthesis to sampling
Late 1970s
Fairlight CMI — early computer-based digital synthesis, sampling and sequencing.
Early 1980s
E-mu Emulator — sampling in a more keyboard-focused instrument.
Late 1980s
Akai S-series — powerful rack sampling became increasingly accessible.
1990s onward
Sampling became central to dance, hip-hop, pop and software production.
The Fairlight is a useful bridge between synthesis and sampling. Its designers were developing digital synthesis, but constructing convincing complex natural timbres was difficult. Capturing real sounds into digital memory offered another route: store a sound, then manipulate and replay it.
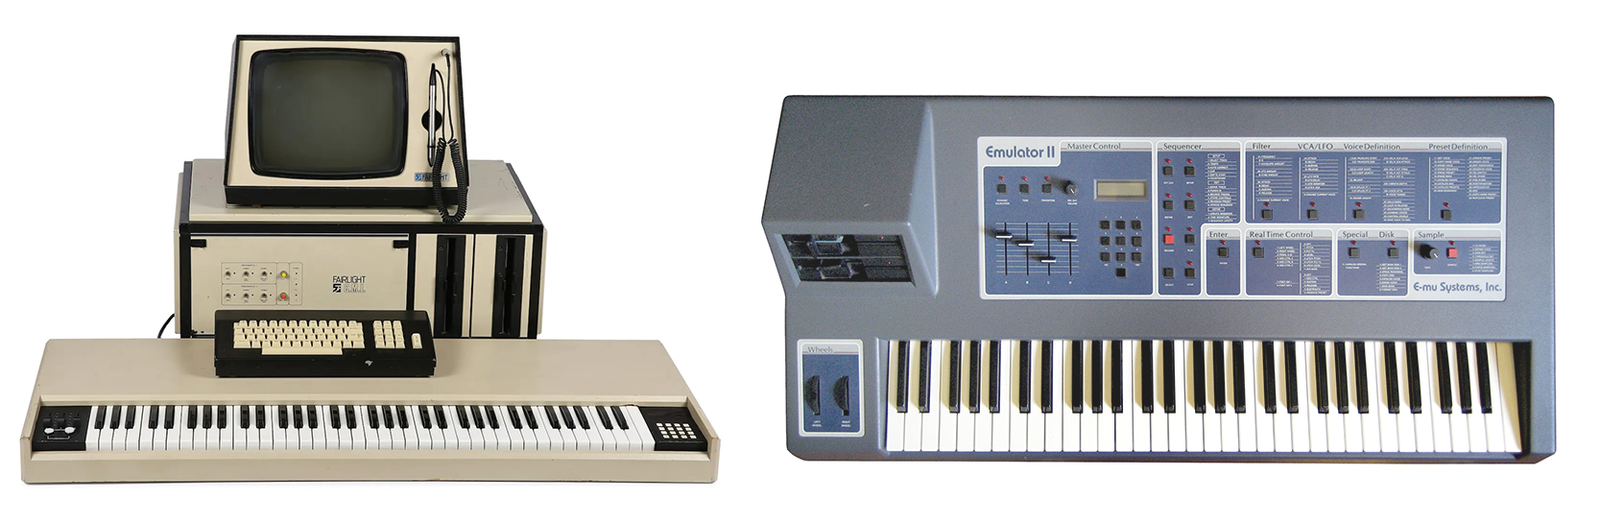
Limitations became an aesthetic. Early digital memory was extremely expensive, so sample time was precious. Producers trimmed aggressively, looped tiny regions, pitched single recordings across keyboards and reused short fragments creatively. Those constraints became part of the sound and working method of early sampling.
We will later connect this to wavetable synthesis. Both read stored waveform data, but a wavetable normally contains short waveform cycles intended for synthesis, while a sampler commonly treats a recorded sound as a playable event.
2. Put audio in a buffer
Click Load built-in C2 sample or choose your own audio file. That user action creates/resumes the Web Audio context, decodes the audio bytes, and places the result into an AudioBuffer.
Drag near START or END to trim the playback region. The shaded samples still exist in memory.
Duration
Sample rate
Channels
Samples / channel
3. Trimming means choosing where to read
sample index = time × sample rate
At 48 kHz, 0.5 seconds × 48,000 = sample 24,000. The sampler can jump directly to that location in memory.
Non-destructive: changing START and END need not erase anything. We simply change where playback begins and stops.
4. Look inside the buffer
Zoom far enough into the waveform and the apparently continuous line resolves into individual stored values.
5. Read faster, slower — or backwards
With simple resampling, speed and pitch are linked. Read twice as fast: half the duration and one octave higher. Read at half speed: twice the duration and one octave lower.
pitch shift = 12 × log₂(playback rate)
This leads directly to keyboard sampling: map one recording across several keys by changing its playback rate. Move far enough from the root note and its duration and timbre change dramatically.
6. What have we built?
Looping reuses part of the memory, while reverse simply changes the direction in which we read it.
AUDIO FILE → BUFFER → START / END → READ POSITION → RATE / REVERSE / LOOP → AUDIO OUT
A basic sampler is a controllable reader for an audio buffer. Everything we already learned can follow it: ADSR → filter → LFO → effects → output.
7. Next: put the sample on a keyboard
Next we give the recording a root note, map it across keys, and explore why early samplers changed both pitch and duration — leading naturally to resampling and time-stretching.